


Huskies have beautiful eyes, bold markings, and the most energetic personalities. Their unique features make them perfect for practicing drawing dogs, no matter if you're looking for easy dog drawings, cute dog drawings, or more detailed and realistic dog drawing. They're a breed that looks as striking and cute on paper as they do in real life.
In this tutorial, we'll go step by step through an easy Husky drawing process. You'll learn how to build a simple framework, refine the face, add realistic eye shadowing, and bring your Husky to life with its classic black, white, and gray colors. The approach is beginner-friendly, so you'll be able to follow along with confidence, no matter if this is your first dog drawing.
Step-by-Step Guide: How to Draw a Husky Dog
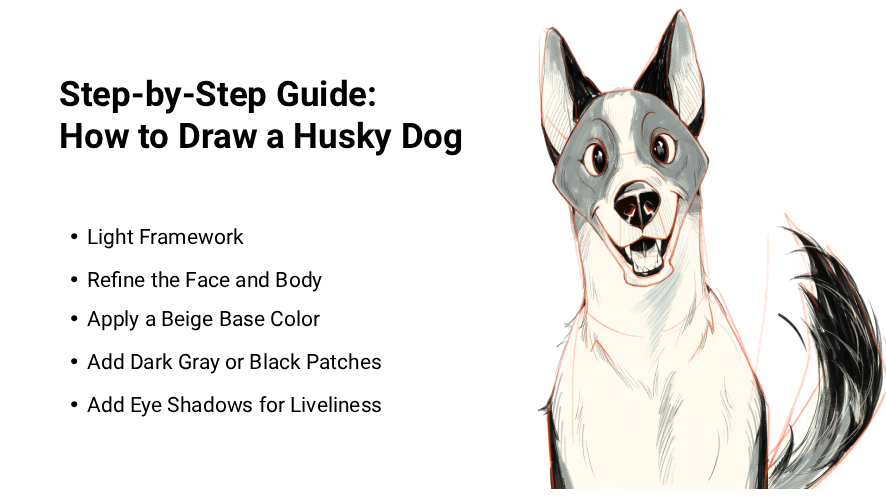
Step 1: Light Framework (Basic Dog Drawing)
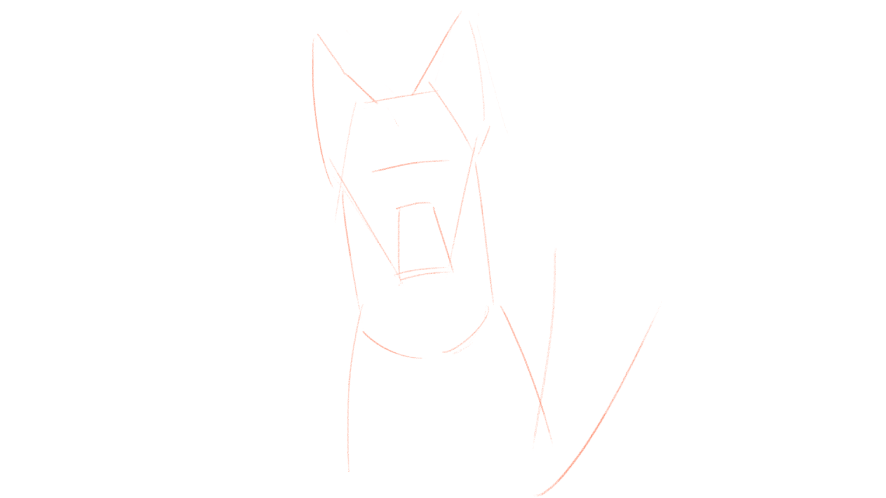
Begin by lightly sketching the outline of your Husky. Don't worry about details yet, just focus on the head, body, posture, and ears. Think of it as mapping out the proportions rather than drawing a finished dog.
Tip for beginners: One thing I see a lot is people pressing too hard at this stage. The lines get heavy and it's tricky to fix mistakes. If you're drawing digitally, try a tablet that can pick up very light strokes. Some tablets respond to as little as 3 grams of pressure, which lets you create faint guidelines that feel a lot like real pencil lines. It makes practicing basic dog drawing a lot smoother and way less frustrating.

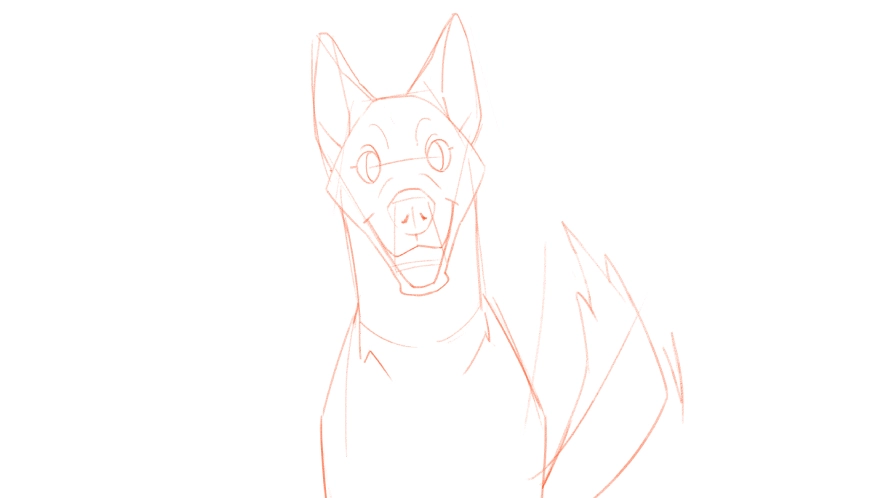
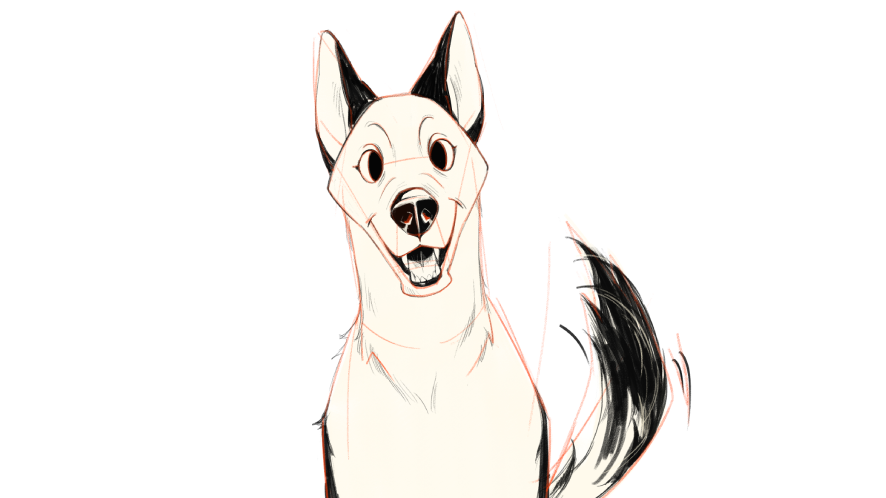
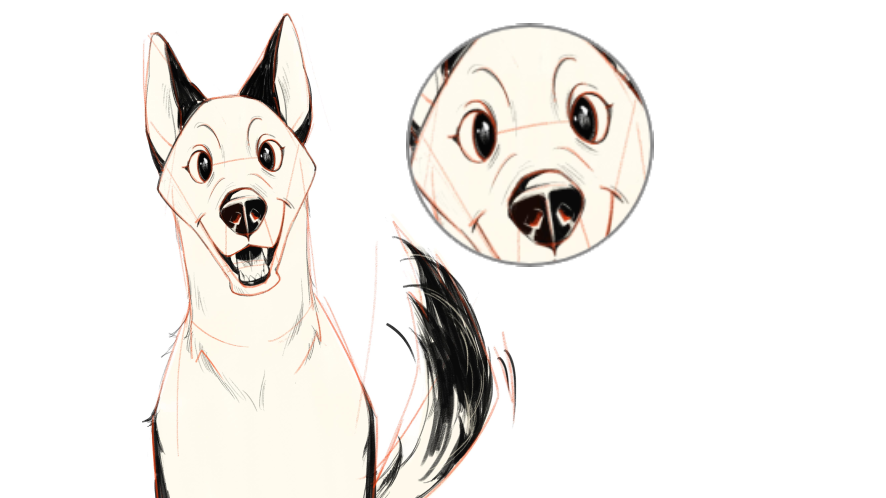
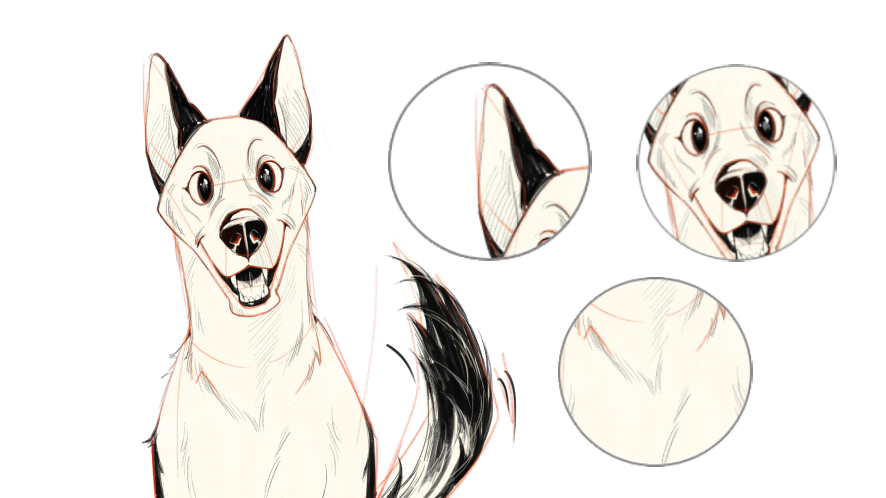
Step 2: Refine the Face and Body
Now, the fun starts! It's time to add those key features that make the Husky so unique: the pointed ears, round eyes, oval nose, open mouth, and tail outline. At this point, the drawing starts to capture the Husky's playful personality.
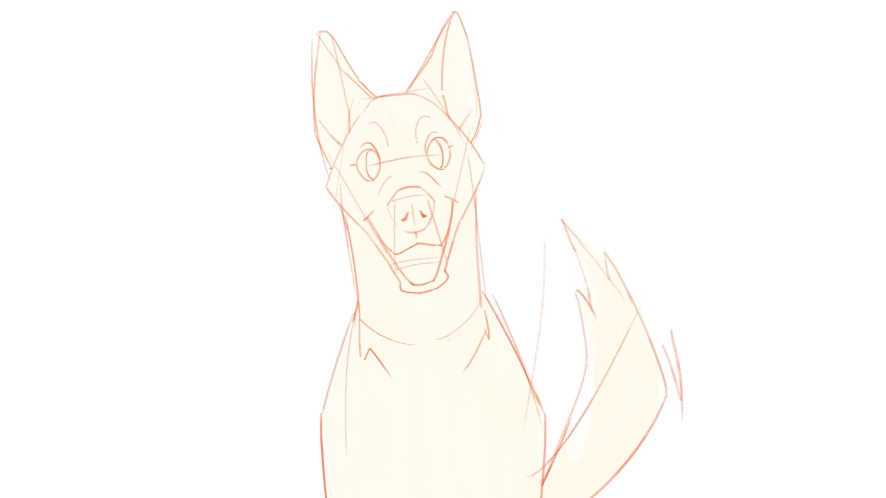
Step 3: Apply a Beige Base Color
Then, start your Husky drawing by applying a soft base color. This creates a solid foundation that helps the fur look natural and smooth, making it easier to add details and markings later. Even if you're just trying to accomplish a simple Husky illustration, this step sets you up for success.
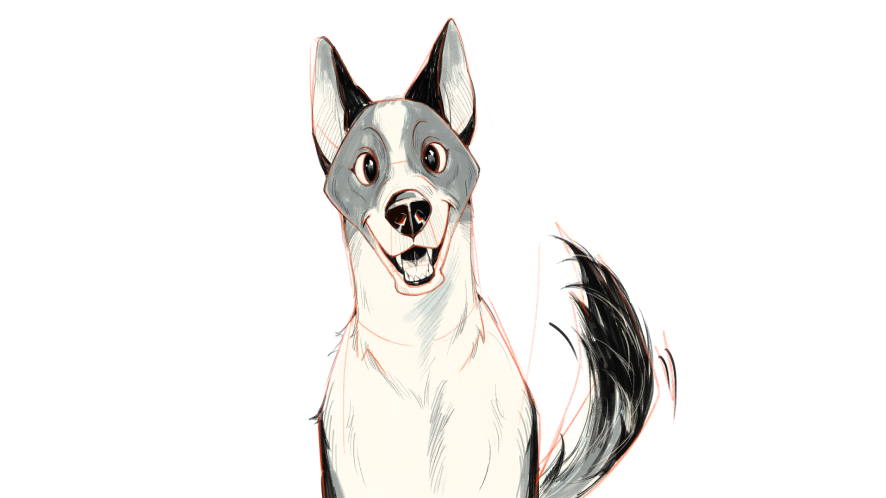
Step 4: Add Dark Gray or Black Patches
The fourth step is to add dark gray or black patches.
Huskies are known for their unique face and body markings. Put dark gray or black patches on the face, ears, eyes, and back. Look closely at the mask-like markings around the eyes, as these are essential for making the Husky look its best.
Step 5: Add Eye Shadows for Liveliness
The fifth step is to add eye shadowing to make the eyes stand out.
Add subtle shadows to the eyes to make the Husky's eyes look lively and expressive. Shadows make things look more 3D.
Tips for Eye Shadows:
• Layer light gray or dark tones gently to enhance depth.
• Keep highlights in the eyes for a realistic sparkle.
Step 6: Add Gray Hair Details
After applying the base color and the dark patches, add the gray fur details to enhance the texture. Use short, overlapping strokes to create fluffy patterns, focusing on the ears, face, tail, and body. Lightly brush hair around the transitions of the nose and cheeks. Using a tablet's multi-texture brushes, you can maintain smooth outlines while simulating the roughness of natural fur, making your Husky appear both adorable and lifelike.
By following these steps, the Husky drawing will have:
- A natural beige base coat
- Distinctive, mask-like dark markings
- Lively, expressive eyes
- Layered gray fur details for realism
Now that you've learned how to draw a Husky dog, here are some tips and things to keep in mind.
Suggested color combinations for huskies:
- Classic black and white (the most iconic look)
- Gray and white (softer, wolf-like appearance)
What Common Mistakes Do Beginners Make When Drawing Huskies?
1. Too-round heads: Huskies have slightly elongated heads, not perfectly circular ones.
2. Flat fur texture: Forgetting to add shading makes the coat look lifeless.
3. Symmetry obsession: Huskies' markings are often asymmetrical. Don't stress about perfection.
How to Draw Realistic Fur Textures and Common Mistakes When Drawing Realistic Fur?
To improve realism, practice fur shading exercises. Use short, overlapping strokes to create clumps of fur. Add contrast by layering light and dark tones. Avoid drawing each hair individually; think in terms of groups of strands.
Additional Resources for Drawing Huskies:
Online dog drawing references from image libraries can help improve your skills.
Useful resources: Freepik
Why a Drawing Tablet Helps Beginners
Even though you can start sketching Huskies on paper, digital drawing makes learning easier and less intimidating. With a drawing tablet, you can:
Undo and redo mistakes instantly, so experimenting is stress-free.
Use layers to separate your sketch, line art, and coloring, keeping your workflow neat.
Enjoy a portable, ultra-thin design (just 8 mm), so you can draw anywhere inspiration strikes.
These features let you focus on mastering each step of drawing a Husky without worrying about errors. Plus, thoughtful details like an ergonomic palm rest with a gentle 6.5° slope and a long-lasting wireless battery mean you can practice comfortably for hours, making learning digital art more enjoyable.
If you're interested in digital art or considering a digital drawing tablet, we recommend the latest v2 Pen Tablet Series from Xencelabs.
Among drawing tablets, Xencelabs stands out in 2026 featuing:
• A natural drawing experience with 3g initial activation pressure and ±60° pen tilt
• Two v2 Pens with different grips, shortcuts, and erasers
• Quick Keys remote with up to 44 customizable shortcuts
• HP Anyware® compatibility for remote work
• Stable Bluetooth 5.0 connection with up to 16 hours of wireless creation
• Ergonomic 6.5° sloped palm rest to reduce wrist fatigue
• Thin, streamlined 8 mm design for portability
• Large 16:9 drawing area for comfortable work
• Includes all the accessories needed for a complete workflow
• Highly compatible with Windows, macOS, and Linux
Our vibrant artist community also shares their artistic insight, tips, and tricks, helping you improve your skills and enjoy drawing, whether it's 2D or 3D. With the right tools and guidance, bringing your creative ideas to life has never been easier.
The wonderful thing about Husky drawing is that it is achievable, step by step! Start with a light framework, refine the face, add clean outlines, and finish with coloring and markings. By breaking it into these simple steps, drawing a Husky becomes approachable for anyone.
Remember, every artist starts with simple lines. Keep practicing, stay curious, and enjoy the process. Soon you'll see your skills and confidence grow, one Husky at a time.