


Drawing realistic eyes is important for artists who specialize in people, whether it's working on portraits, character designs, or providing artwork for publications. The eyes are considered the window to the soul, and capturing their essence adds depth and dimension to your work. In this article, we'll walk you through the step-by-step process of drawing a realistic eye using new tools in technology and time-honored art instruction that will help you draw life-like eyes.
At first, drawing realistic eyes may seem daunting, but with the right techniques and tools, anyone can master this skill. Here, we will cover everything from gathering reference materials to adding the final touches that make every eye you draw unique. So, grab your sketchbook, and let's dive in!
The Importance of Drawing Realistic Facial Sketches

Facial sketches are important in many fields, from law enforcement to entertainment. In criminal investigations, skilled sketch artists work with witnesses to create accurate depictions of suspects, helping to identify and apprehend criminals. These sketches rely heavily on the artist's ability to capture the nuances of facial features, especially the eyes, which can be crucial in recognizing an individual.
In entertainment, concept artists and character designers use realistic facial sketches to bring their ideas to life. An expertly detailed face can convey a character's personality, emotions, and backstory in movies, video games, comic books, and more. The eyes are important in connecting with the audience, and when expertly detailed, they bring more life to the character.
Learning how to draw a realistic eye can elevate your artwork and open up new opportunities in many different industries. By following the step-by-step process outlined below, you'll be well on your way to creating lifelike eyes and giving your artwork more depth.
How to Draw a Real-Life Eye Step-by-Step
This set of steps is a generalized overview of how to draw a realistic eye. You can find detailed steps online from sites like The Drawing Factory or YouTube videos where artists walk you through using software with a tablet and pen.
Step 1: Collect Reference Materials
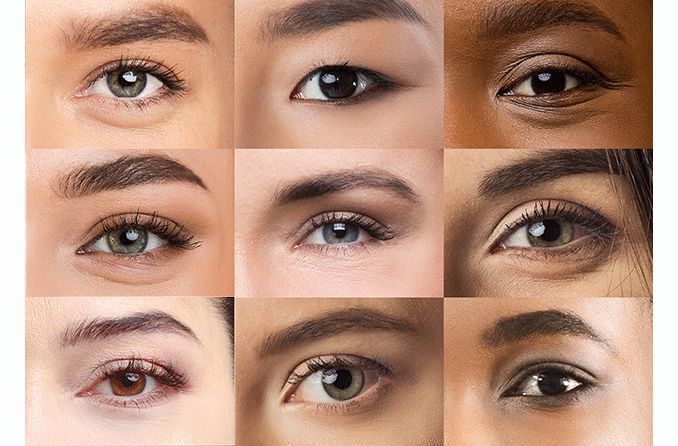
Before you begin drawing, do your research and collect reference materials. Search for high-quality photos of real eyes from various angles and lighting conditions. This will help you understand the anatomy and structure of the eye and how light interacts with its surface. Pinterest and Google Images are excellent resources; you can also browse online photography sites like iStock Photos. You don't have to purchase the photos if you are looking around.
Step 2: Drawing Tools and Materials

Traditionally, drawing a realistic eye involves traditional artistic tools like sketchbooks or specialty paper. You would also need different types of pencils for sketching and blending. These consumable tools must be replenished often; you can't just save your work and start over on the same piece of paper.
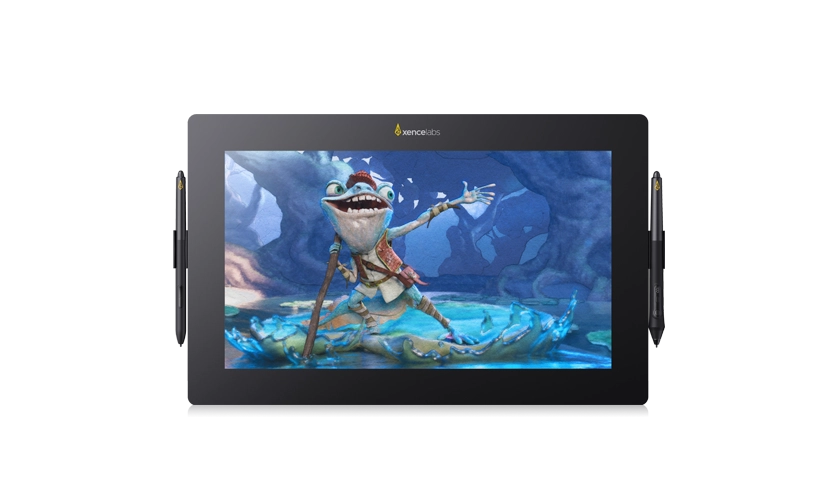
Today, technology has changed the game. Consider investing in a pen tablet like the Xencelabs Pen Tablet. With its high-resolution display and pressure-sensitive pen, Xencelabs pen tablet offers a natural drawing experience, helping you achieve smoother lines and more precise control over your shading and blending. Other features of this drawing tablet include:
Multiple pen sizes; choose the one that is most comfortable for your hand
Tablet is available in multiple sizes
Large drawing area
Wireless connection for added portability
Ergonomic palm rest reduces strain on the wrist
Long battery life
This drawing tablet feels like drawing on an artist's paper. The best part is that you don't have to tear off a sheet and start over when you make a mistake or want to start a new drawing. You can simply save and start over or erase everything and start over. Not only is it time-saving, but it's also money-saving.
Now that you have the tools for drawing a realistic eye, it's time to start learning the basic steps to draw an eye that is so real your audience can't help but feel a connection.
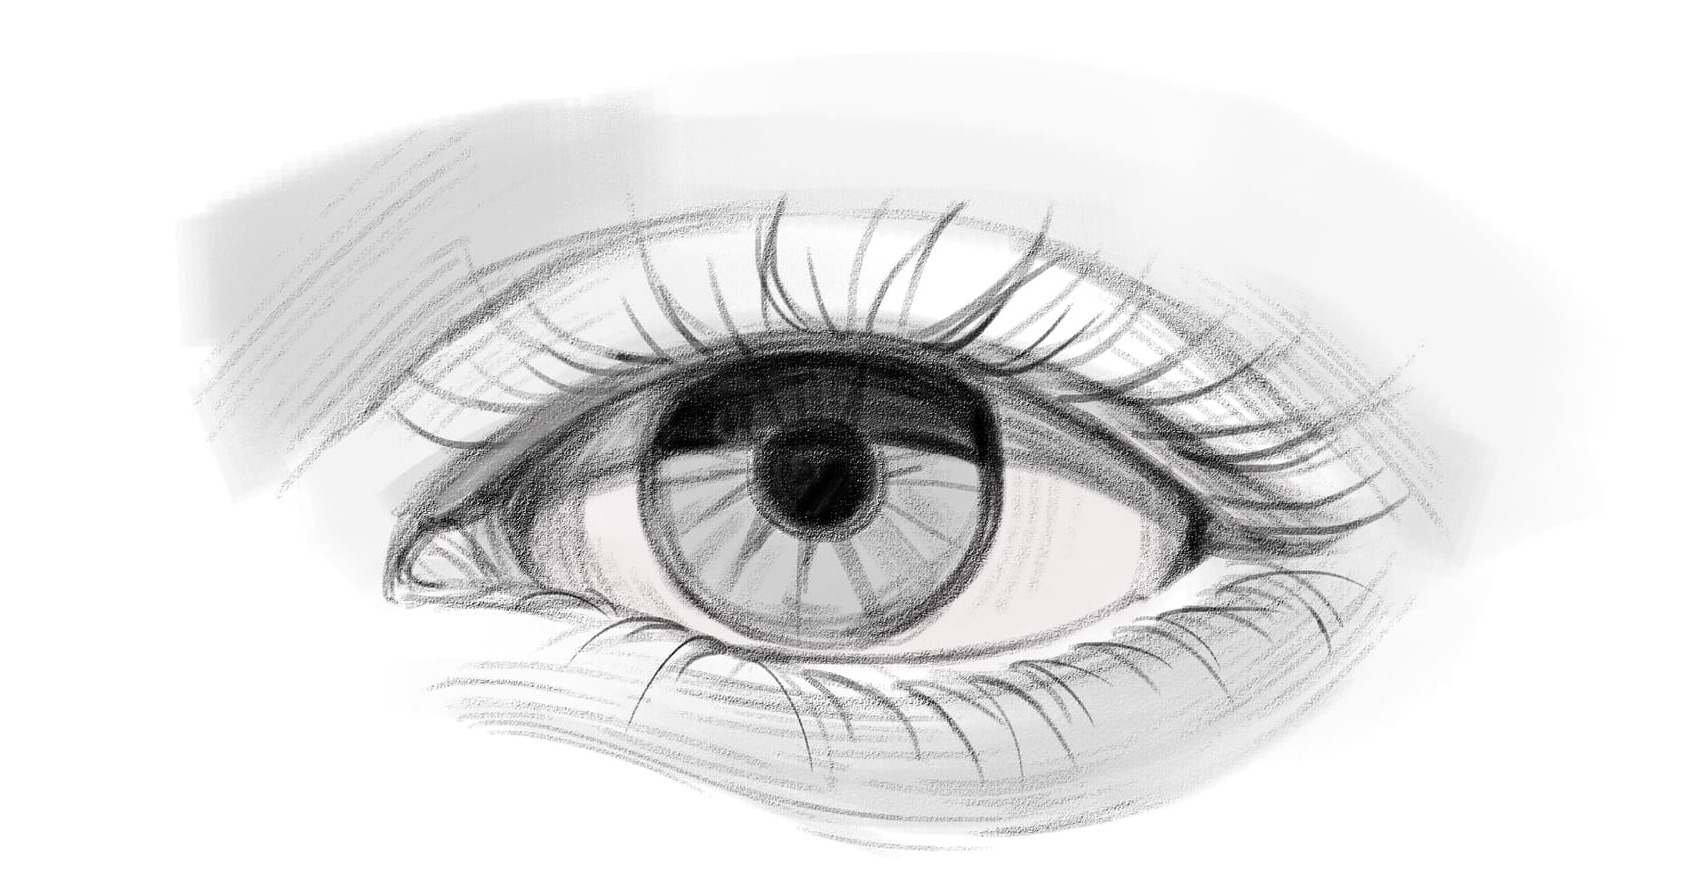
Step 3: Draw a Basic Outline and Pupil

Begin by sketching the basic outline of the eye. Draw an almond shape for the visible part of the eyeball, and then add a curved line above it for the upper eyelid. Sketch a smaller, curved line below the lower eyelid. Lines should be light and loose.
Next, partially cover the upper eyelid with a circle drawn in the almond shape; this is the iris. Now, add a smaller circle within the iris, slightly off-center towards the upper eyelid, for the pupil.
Step 4: Add Iris Details and Textures
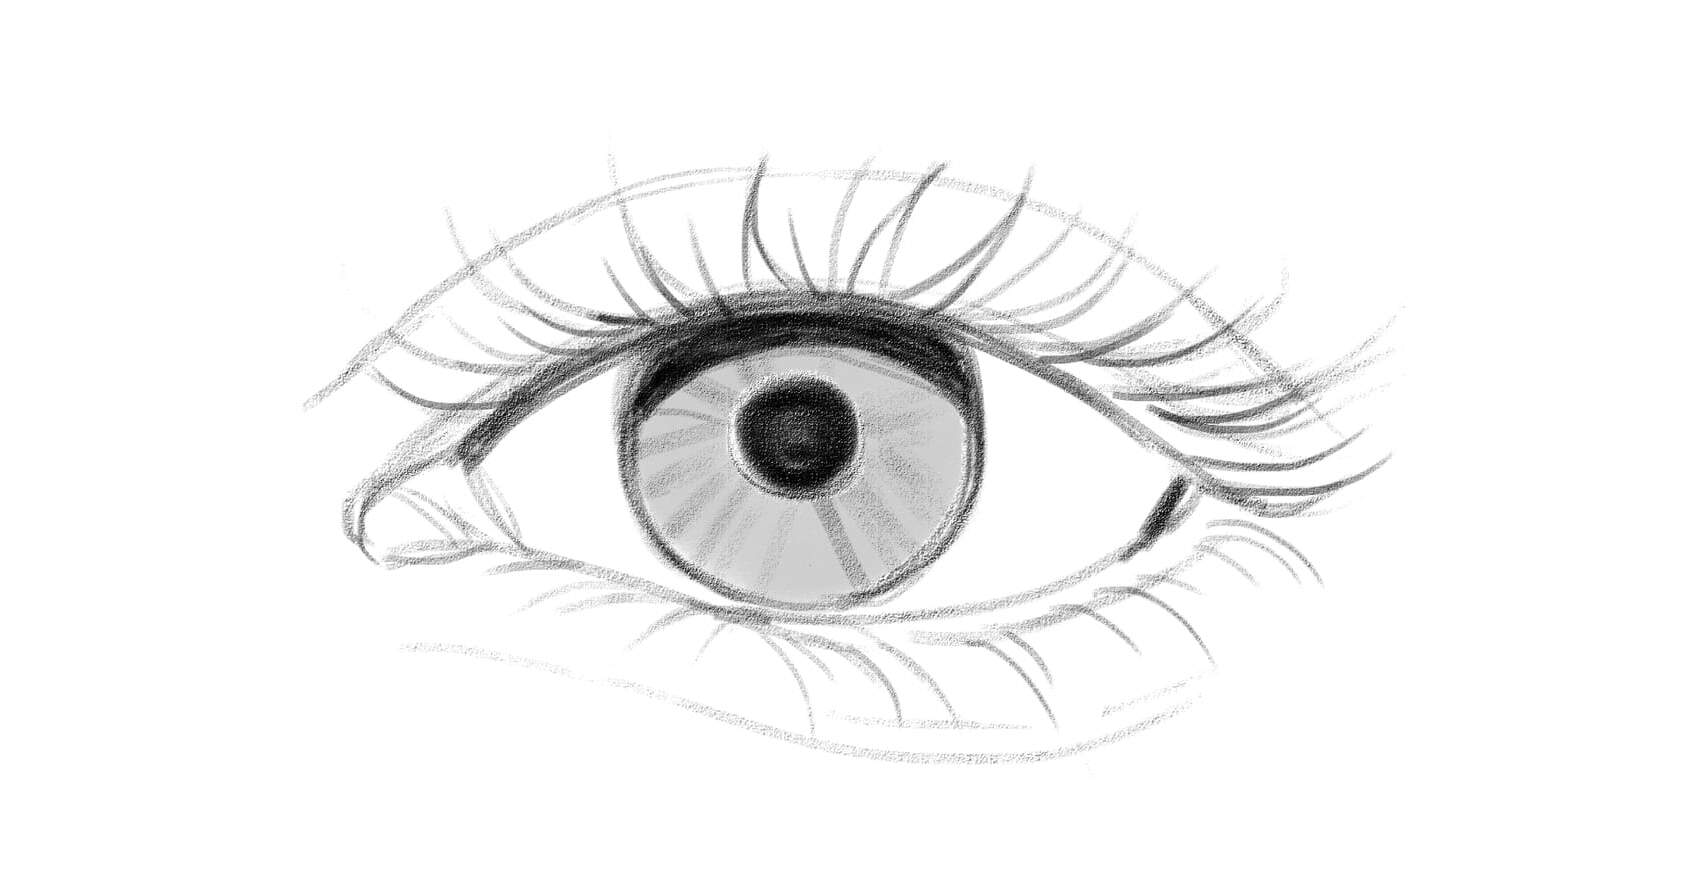
Now, it's time to add details and textures to the iris. If you use traditional pencils and paper, start by shading the pupil with a dark pencil or pen. Add a combination of straight and curved lines radiating from the pupil to create unique patterns within the iris. Vary the thickness and spacing of these lines to achieve a more natural look.
When using your digital tablet to draw realistic eyes, use the tools in your software to adjust the thickness and spacing of the lines and shading options. There's no need to stop and change tools while drawing.
To add depth and dimension to the iris, use a blending tool for paper or the blending option in your software. Don't forget to leave some highlights within the iris to give it a glossy, wet appearance.
Step 5: Add Shadows and Lights
Shadows and lights make your eye drawing truly realistic. First, identify the direction of the light source in your reference photo. Then, use a soft pencil or adjust your program's settings to add shadows where they would naturally appear, such as the crease above the eyelid and the corners of the eye.
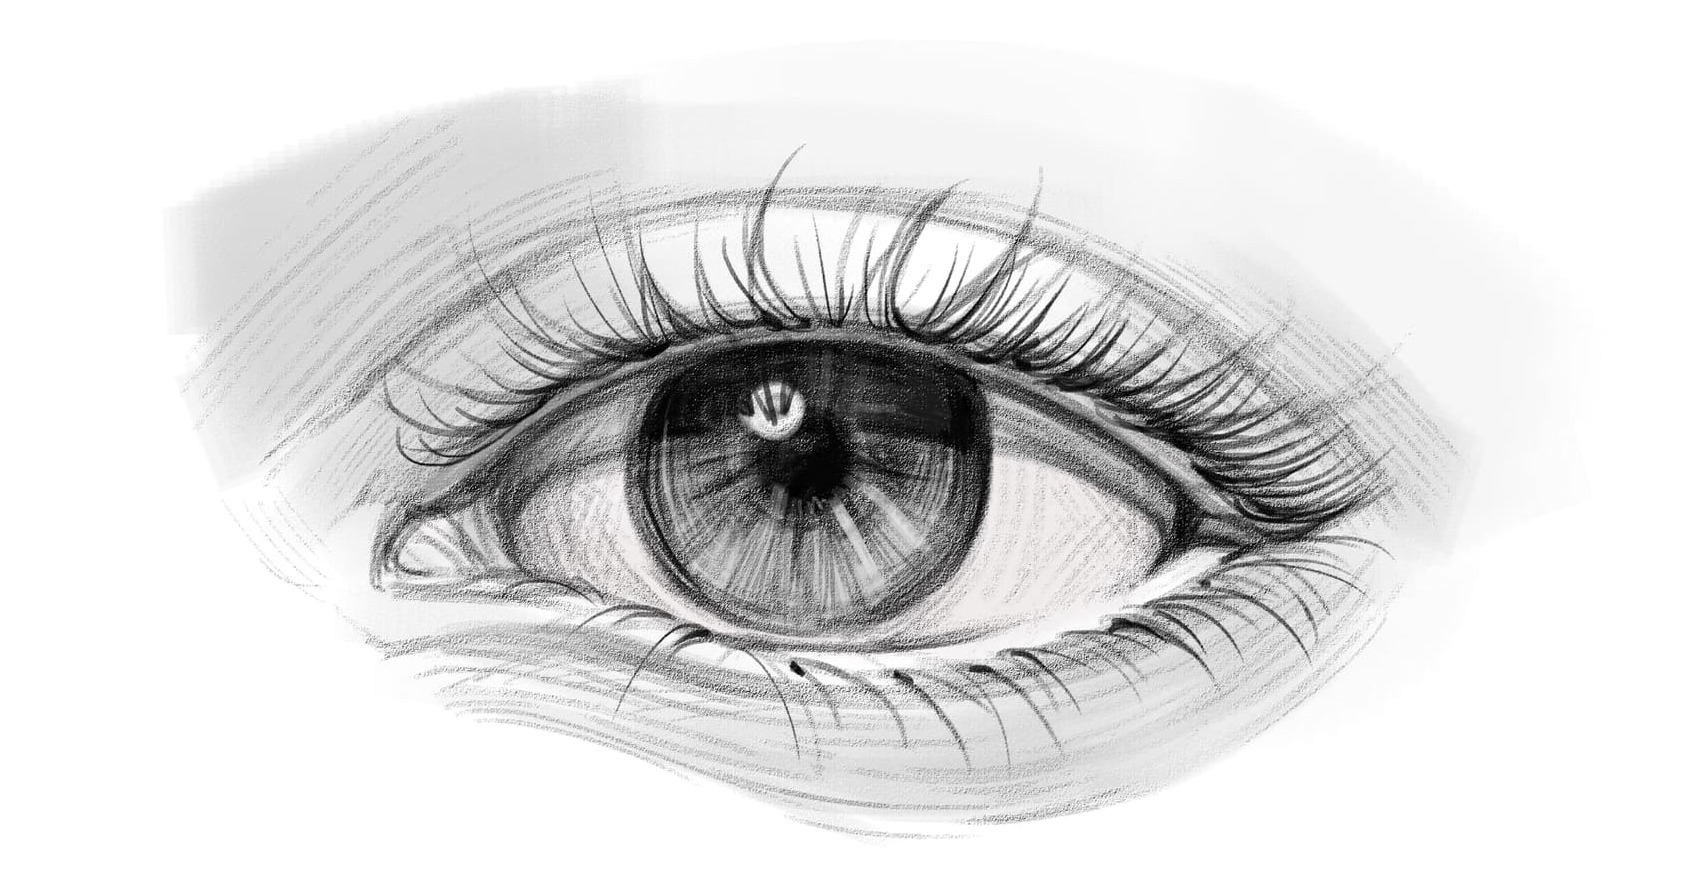
Use a kneaded eraser or a white gel pen to highlight the areas of the eye that would reflect light, such as the tear duct and the reflection of the light source on the iris and pupil. Blend these highlights and shadows to create smooth transitions and a more natural look. You can adjust your program settings to do this using your digital pen.
These steps are essentially the same regardless of whether you use pencils and paper or a tablet and pen. The benefits of the tablet and pen will become evident as you go through the steps. Each step requires a different pencil, line width, or shading tool. With a pen and tablet, you don't have to stop and change pencils or sharpen one when it becomes dull. You change the program tool and keep drawing. To get the most out of these digital advantages, having a robust and well-integrated driver is essential. Whether you are working on a Mac, Windows, or Linux system, our [Mac, Windows & Linux Compatible Drawing Tablet: A Guide to Xencelabs Drivers] shows how our software is designed to provide a seamless and professional creative experience for every artist.
Improve Your Skills in Drawing Real Eyes
Now that you know the basic steps to drawing a realistic eye, you can continue to improve and become a master at it. Use these steps to perfect your drawing of realistic eyes. When the eyes you draw pull people in, you will become a sought-after artist.
1. Observe and Study Real Eyes
One of the best ways to improve your artistic skills when drawing realistic eyes is to observe and study them. Pay attention to subtle details, such as how the eyelids curve, the patterns within the iris, and the reflections of light on the eye's surface.
When possible, take pictures of eyes in different lighting and study how light affects their appearance. Note how these details vary among different people and in different lighting conditions.
2.Learn Eye Anatomy
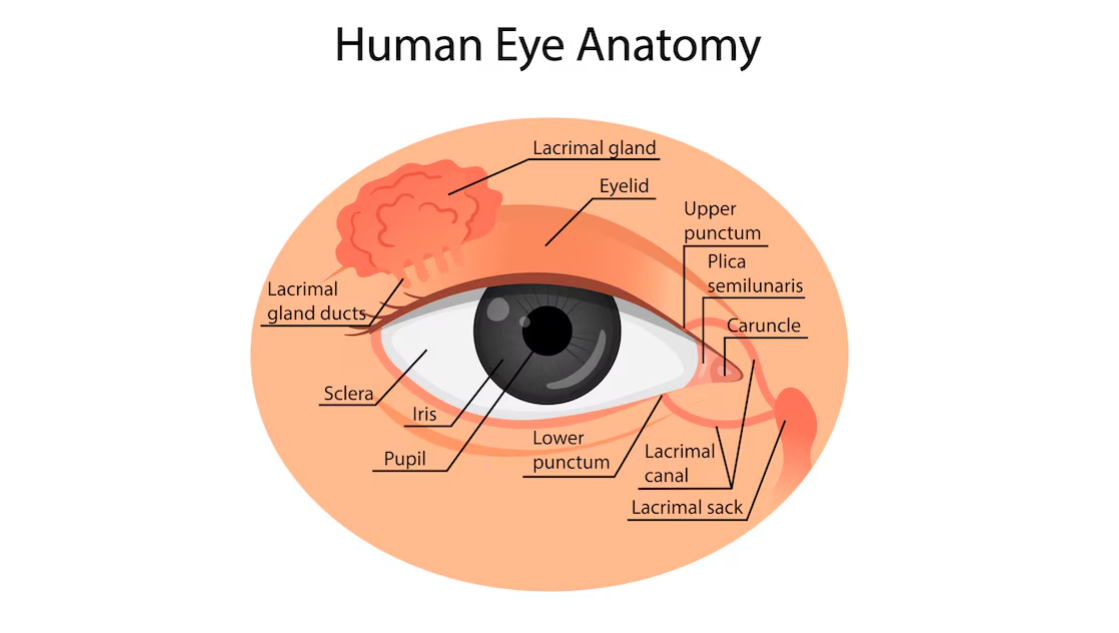
To draw truly realistic eyes, you have to understand their anatomy. Study the structure of the eyeball and the muscles surrounding it. Learn how each structure affects the appearance of the eye. For example, weak facial muscles may make an eye appear to hang.
Study the various visible parts of the eye, such as the cornea, iris, and pupil. Learn how different conditions affect the eye, like cataracts. When you understand the anatomy of the eye, your eye drawings will be more realistic and connect better with your audience.
3. Keep Practicing and Trying
Drawing a realistic eye is the same as learning any skill; practice makes perfect. Set aside time daily to sketch eyes from different angles and in various lighting conditions. Experiment with different tools and techniques to find what works best for you. Don't be discouraged if your first attempts don't turn out perfect - with persistence and dedication, you'll know how to draw the most realistic eye.
Learning how to draw a realistic eye requires dedication. You will have to practice over and over again. Patience and attention to detail are a must. The first step is using the step-by-step tools we have outlined here.
Invest in top-quality tools, like the Xencelabs Pen Tablet Series. This pen and tablet will be your best friend as you learn. You will be glad you don't have to stop and buy new pencils or paper while you learn and perfect your craft. Now that you have learned how to draw realistic eyes grab your pen and tablet and get started.
Ready for the next step? Discover how to draw a realistic face .