


Halloween is a great time to bring a touch of spooky charm to your drawings. From classic floating, bedsheet-style ghosts to playful little spirits on broomsticks, this simple tutorial will guide you through each step of the Halloween ghost drawing process.
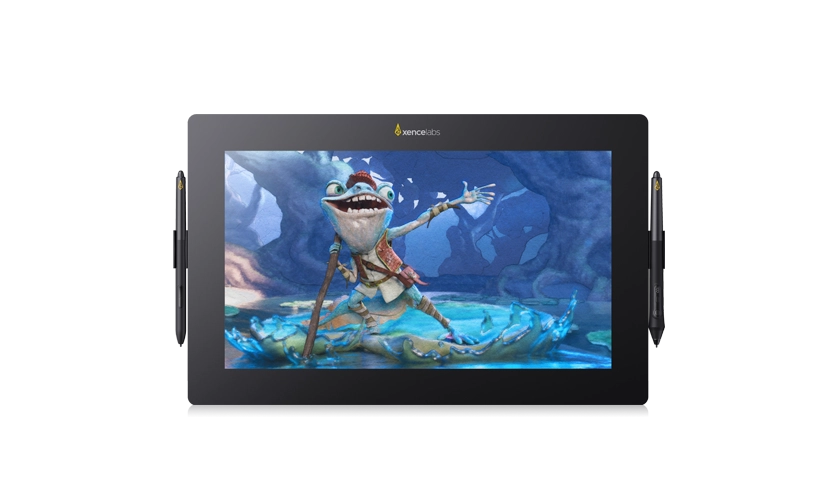
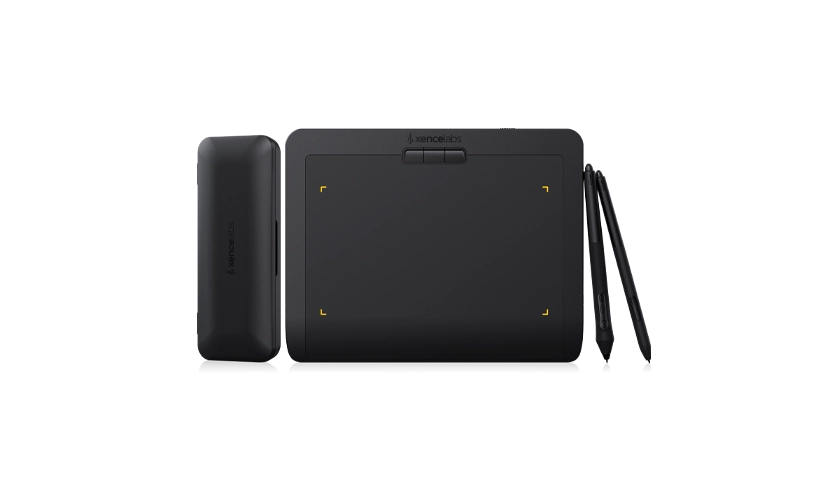
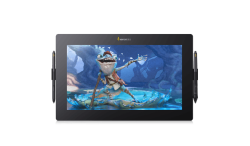
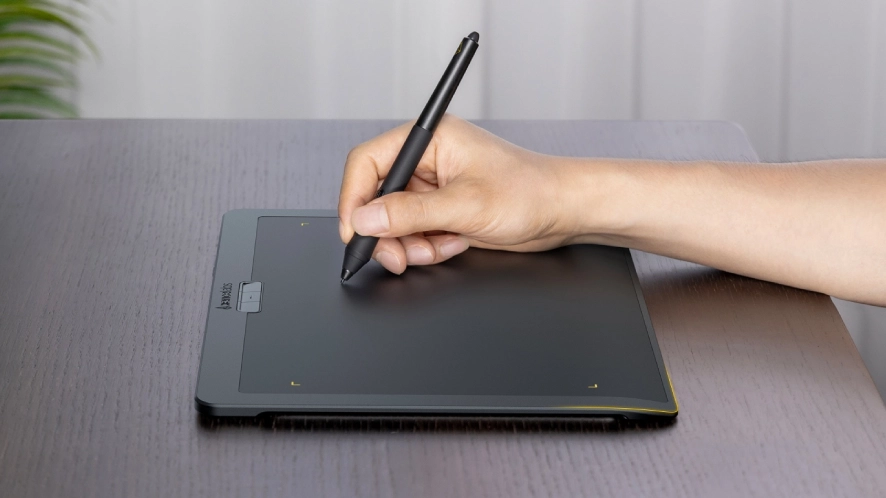
We'll be using a Xencelabs Pen Tablet. Its surface has a texture that allows for a natural, pen-and-paper drawing experience, and it has a finely tuned pressure curve with 3 g of initial activation pressure. This makes every pen stroke feel natural and precise. It's easy to sketch the ghost outline or shade a robe.
Let's dive in and start creating your very own Halloween ghost!
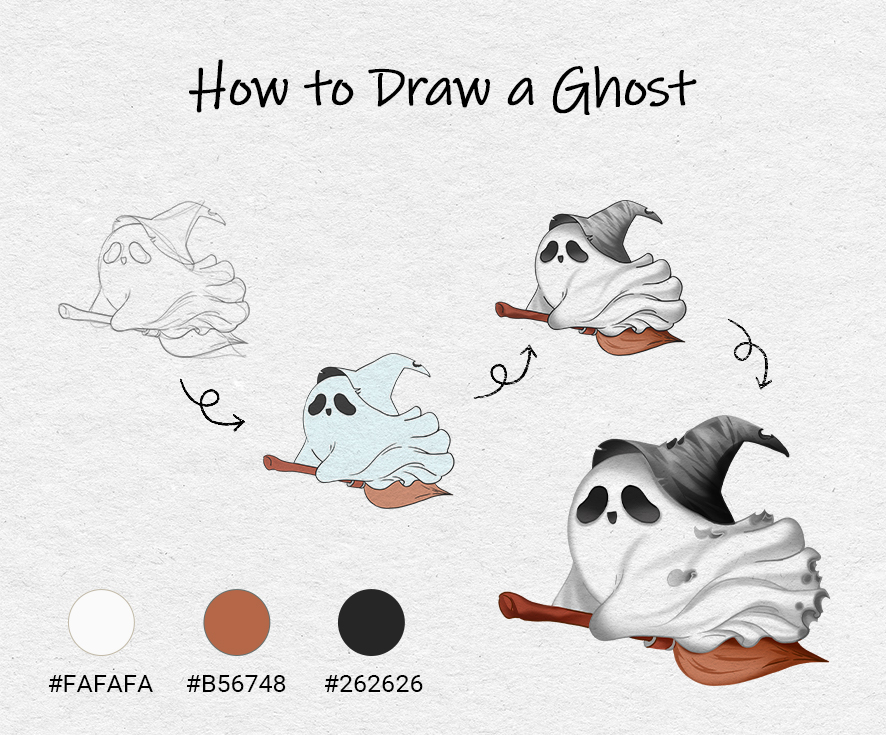
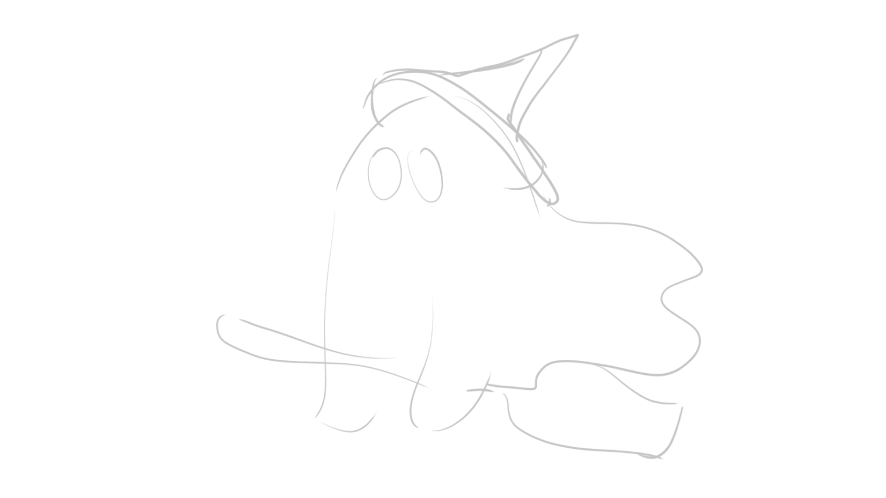
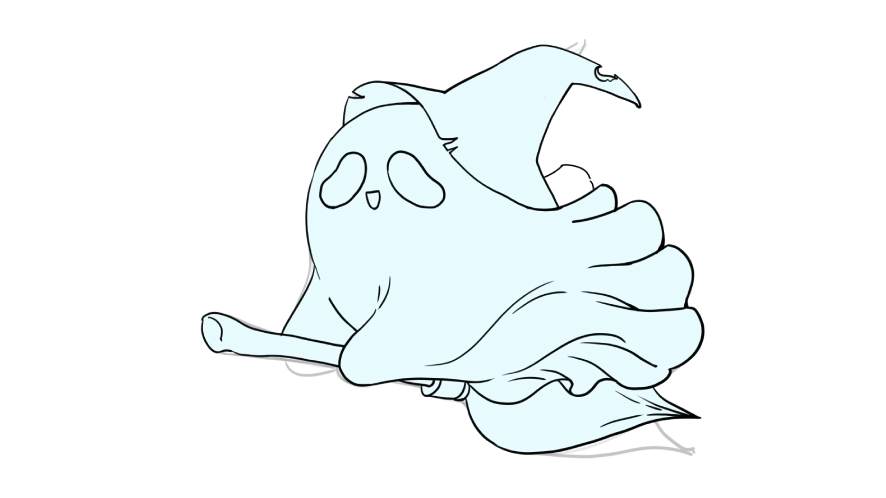
Step 1: Sketch the Basic Shape
Begin with a light sketch of your ghost's body. Think of that classic bedsheet-style ghost shape: soft, flowing, and slightly billowed by the wind. Our ghost is flying on a broom, so sketch a slightly curved broom handle underneath, then outline the ghost's form as if it's gliding forward.
Draw the hat on top, tilted playfully to one side. This adds a charming touch that makes the design feel more like a cute ghost drawing than a scary one. Keep your lines loose and free. You can refine them later.
Tip: With a Xencelabs Pen Tablet, even a light touch registers clearly thanks to its 3 g initial activation pressure. That means you can sketch faint guidelines without worrying about pressing too hard; perfect for smooth, flowing shapes like this ghost's robe.
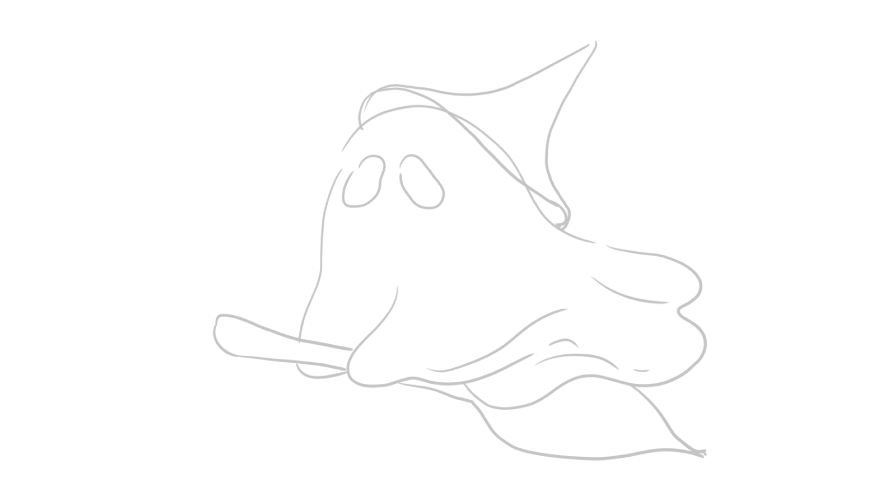

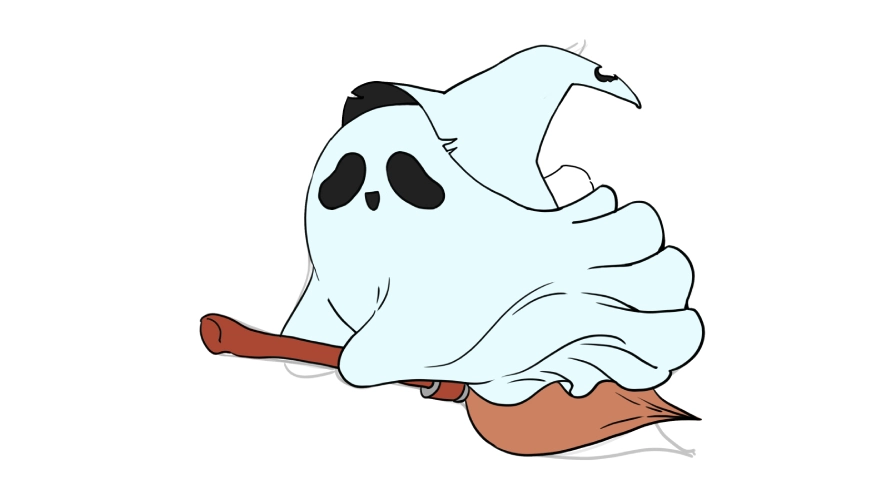
Step 2 : Shaping the Silhouette for Clean Coloring
Next, let's move onto the base silhouette stage to prepare for clean coloring and detailing. Use a deep blue tone to fill in the main shape of your ghost. This helps define the overall form and makes it easier to keep your colors neat. Once you're satisfied with the silhouette, start adding base colors to smaller areas like the eyes, broom, and hat brim.
This process ensures that your color edges stay crisp and organized, giving your ghost drawing a polished look from the start.
When coloring digitally, light control of your pen pressure helps create even fills and clean edges. The Xencelabs Pen Tablet, with its perfectly balanced pressure sensitivity and natural pen-on-paper feel, makes this step smooth and precise. You can easily add color or soften transitions without changing your rhythm.
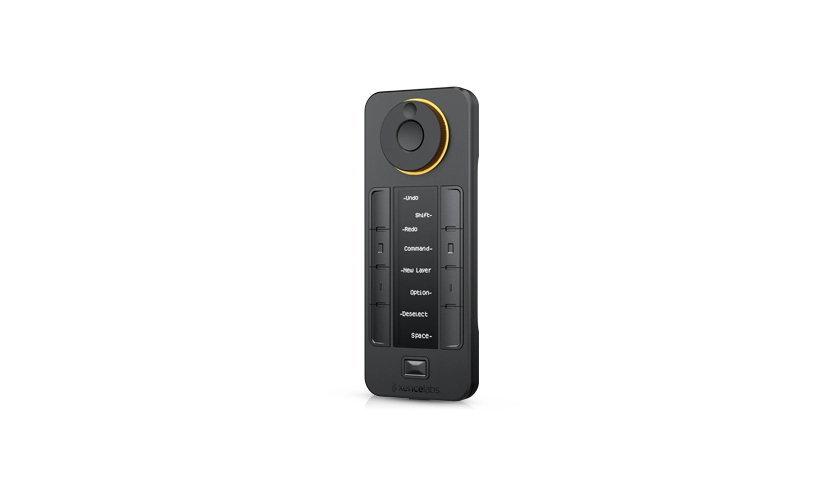
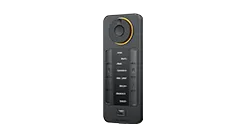
Quick Keys Tip: Use a Quick Keys remote to switch between brush and eraser tools or to quickly adjust brush size. Its clear OLED display and customizable shortcut sets keep everything at your fingertips, so you can stay focused on shaping your ghost's personality.
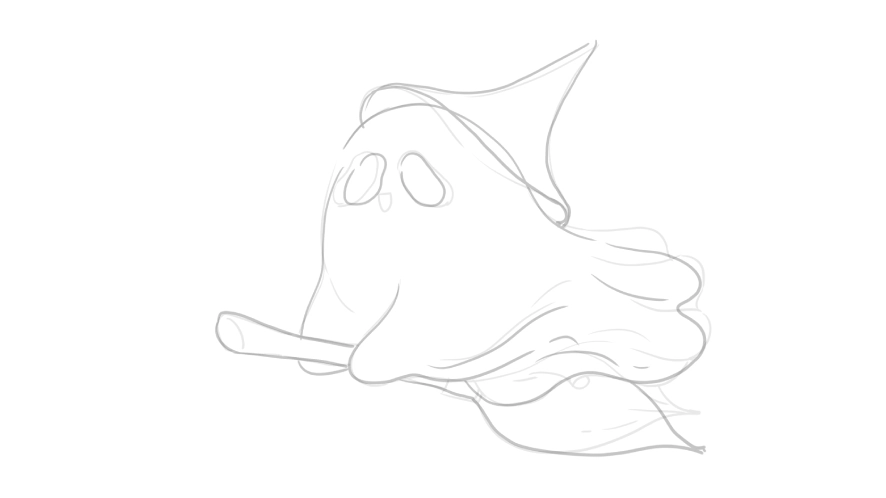
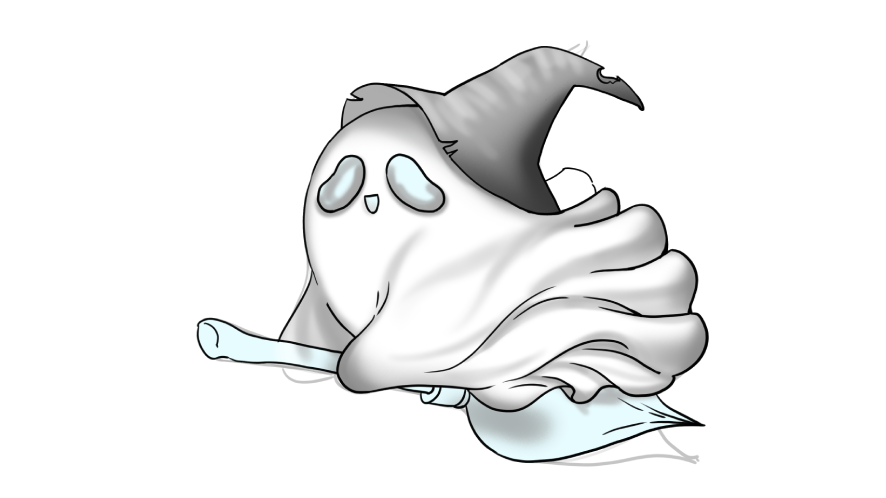
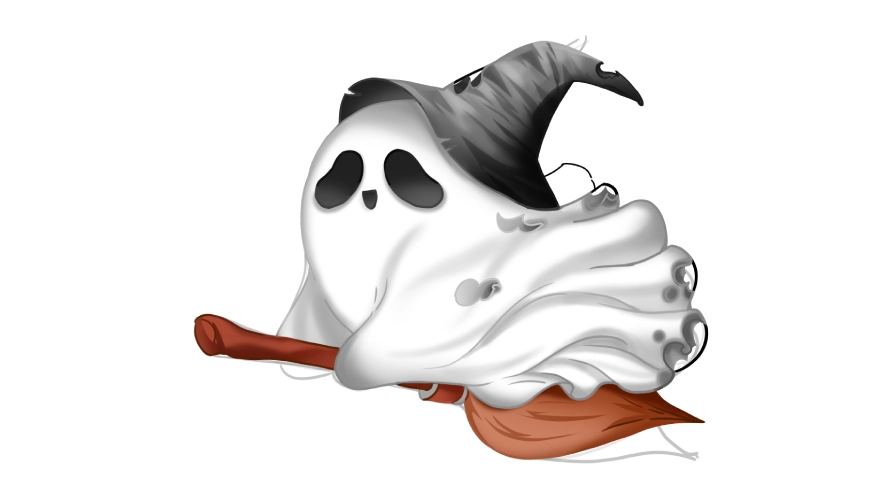
Step 3: Shading and Coloring to Make Your Ghost Look More 3D
It's time to make your ghost drawing truly stand out. Use darker grays for the hat, blending them smoothly into lighter tones. Add a few soft folds and creases to suggest texture and movement. Use brown for the broom and include some subtle folds there as well for consistency.
To make your ghost look more 3D and floating, build shadows along the fabric folds and under the hat. Use a soft brush for the smoothest transitions. Shade the lower edges of the ghost's robe and the areas wrapping around the broomstick. You will see the folds take on a realistic form as if the ghost is drifting through the night sky.
At this stage, your ghost should already look cute and full of expression. Deepen the shadows and refine the hat and broom details to make it stand out even more. Add ghostly effects to create an extra touch of atmosphere. Use a faint transparency around the edges or a soft glow. These subtle touches give your ghost an ethereal feel and a touch of that signature Halloween magic.
Workflow Boost: Use the Quick Keys' physical dial to zoom in or adjust brush size. You can even assign one dial mode to control zoom and another for brush flow, making detail work incredibly intuitive.
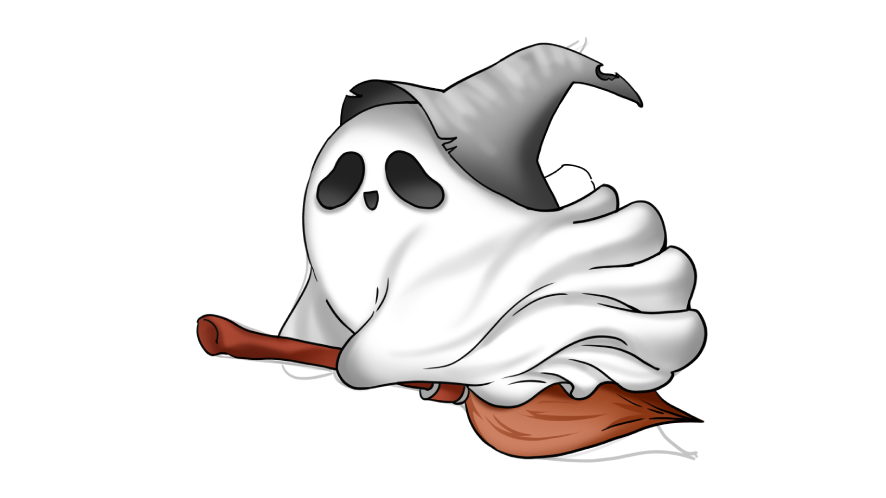
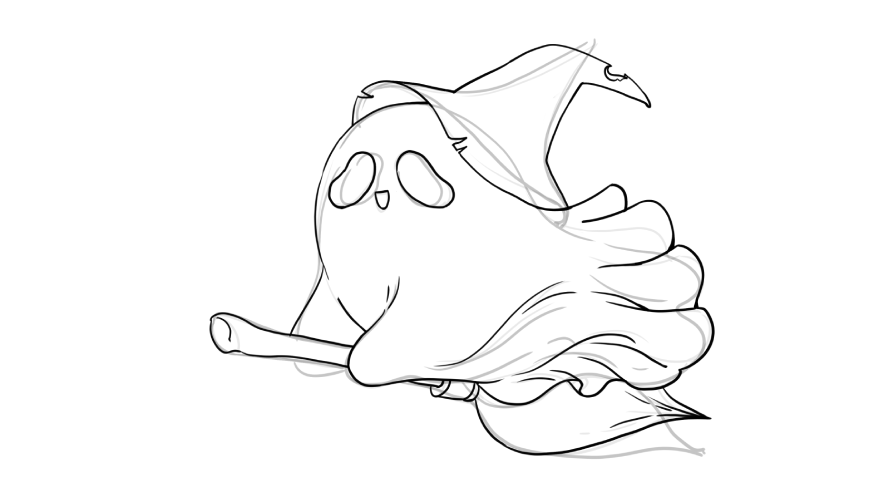
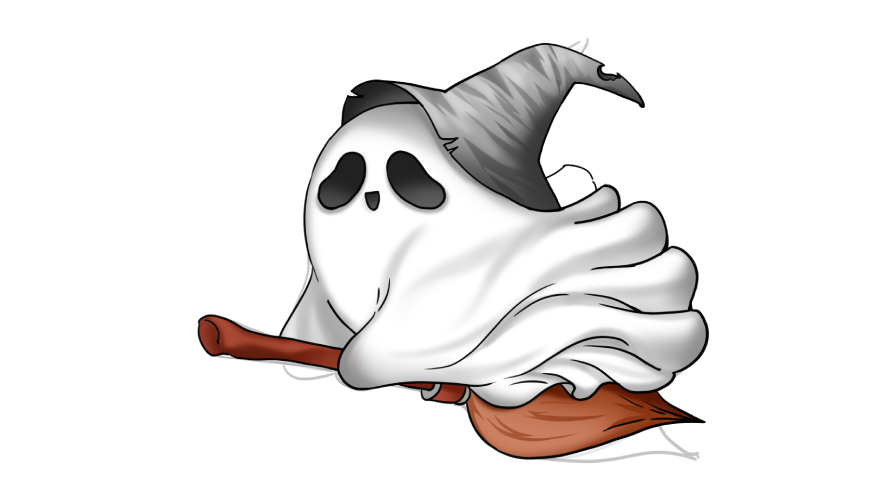
Step 4: Deepen the Shadows and Add Details
Your floating ghost drawing is almost done. For extra atmosphere, lightly blend gray and white tones around the edges. Experiment with small details; maybe a torn edge on the rob, or sparkles drifting around the ghost.
And that's it! You've learned how to draw a ghost, and not just any ghost, but a cute, floating, Halloween-ready spirit full of charm.

How to Draw a Ghost Face?
If you want a more scary ghost drawing, you can darken the eye shapes and add a misty glow. For a cute ghost drawing, keep the tones light and round, with a cheerful expression.
More Halloween Drawing Ideas
Now that you've learned how to draw this simple ghost, why not try out some other fun Halloween ideas?
• Creepy ghost drawings: Try stretching the shadows, sharpening the edges, and adding eerie lighting to give your ghost a haunting, mysterious vibe.
• Cartoon drawings of ghosts: Keep the shapes simple and exaggerate the facial features for a playful, kid-friendly look.
• Ghost spider drawing: Give your ghost spider legs or add web details for a spooky Halloween twist.
These little exercises are a great way to boost your confidence in digital drawing and spark your imagination.
Don't worry about making them perfectly straight — curves and small irregularities make it look real.
Tips for a Better Drawing Experience
Unlike typical flat drawing tablets, the Xencelabs Pen Tablet drawing area smoothly transitions into a gently curved palm rest with a 6.5° slope, providing wrist support and reducing fatigue during extended drawing sessions.You'll notice less fatigue as you refine your ghost's textures and lighting.
If you haven't experienced a Xencelabs Pen Tablet before, let us share why Xencelabs stands out in 2025 with the v2 Pen Tablet Series.
Xencelabs v2 Pen Tablet Series features:
• A natural drawing experience with 3 g initial activation pressure and ±60° pen tilt
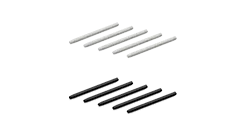
• Two v2 Pens with different grips, shortcuts, and erasers
• Quick Keys remote with up to 44 customizable shortcuts per application
• HP Anyware® compatibility for remote work
• Stable Bluetooth 5.0 connection with up to 16 hours of wireless creation
• Ergonomic 6.5° sloped palm rest to reduce wrist fatigue
• Thin, streamlined 8 mm design for portability
• Large 16:9 drawing area for comfortable work
• Includes all the accessories needed for a complete workflow
• Highly compatible with Windows, macOS, and Linux support
Plus, new customers can enjoy a discount; just head to the shop!
Our vibrant artist community is here to share their artistic insight, tips, and tricks. They will help you improve your skills and enjoy creating even more, whether it's 2D or 3D. Use the right tools and guidance, and you will easily bring your creative ideas to life.
Grab your pen and open your drawing software. Use a Xencelabs Pen Tablet and the community as your support system to let your creativity soar! Show off your spooky spirits or cute bedsheet-style ghosts online. We can't wait to see them. Your art is going to inspire others this Halloween season, whether it's spooky or cute.