


Black cats have always been popular subjects in art, not only because of their connection to Halloween and mysterious folklore, but also because of how charming they are in real life. Their dark fur allows them to blend quietly into shadows and corners, sometimes becoming almost invisible until they suddenly open their large round eyes and stare back at you. That contrast between soft black fur and bright eyes is exactly what makes them so adorable and memorable.
A black cat is actually a great subject for practising digital art fundamentals like value control, edge softness, and fur texture.
Before you begin, it’s useful to prepare a photo reference. Choosing a cute black cat drawing reference or a pose you personally like will make the process easier and help the final illustration feel more natural.
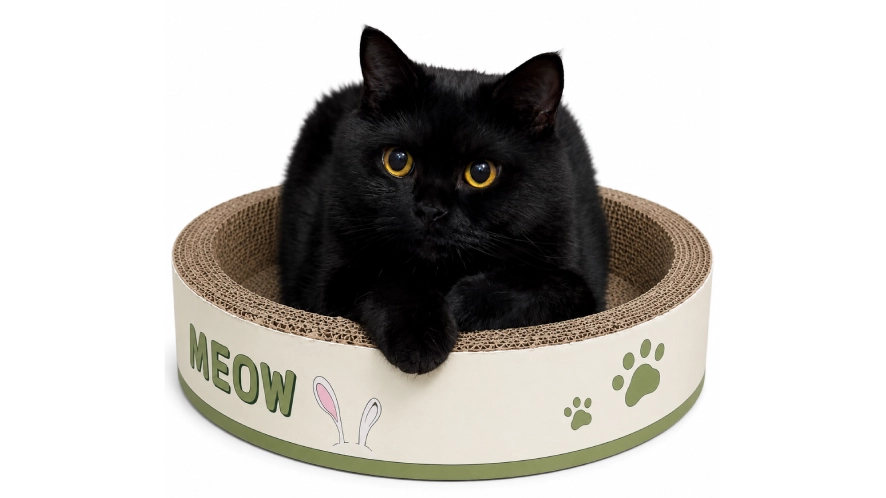
Pay attention to small details such as fur direction, ear shape, and how light falls across the face and body. These subtle changes add depth and realism to a cat portrait drawing.
A responsive digital art tablet also makes a noticeable difference when working on soft fur texture, eye highlights, and other fine details. In this tutorial, we’ll go through the full process of creating a black cat illustration from a photo reference using a pen tablet.
From blocking in the initial pose to refining whiskers, shadows, and reflective eyes, this step-by-step guide is suitable for beginners who want an easy black cat drawing tutorial, as well as artists looking to improve their digital cat portrait techniques.
Why Use a Pen Tablet for Black Cat Drawing?
Fur texture and soft shading are much easier to control digitally, especially when drawing dark subjects like black cats. A professional pen tablet gives better accuracy when drawing fur, shadows, and subtle lighting transitions compared with a mouse.
The Pen Tablet Medium Bundle is especially useful for digital illustration because it offers:
• Pressure sensitivity for softer shading transitions
• Better control when drawing fur and whiskers
Whether you’re creating a fluffy black cat drawing or a polished black cat face drawing, drawing with a pen tablet also makes small adjustments much easier, especially during shading and fur detailing.
Step by Step Black Cat Drawing Tutorial
Step 1: Draw the Rough Sketch and Refine the Structure
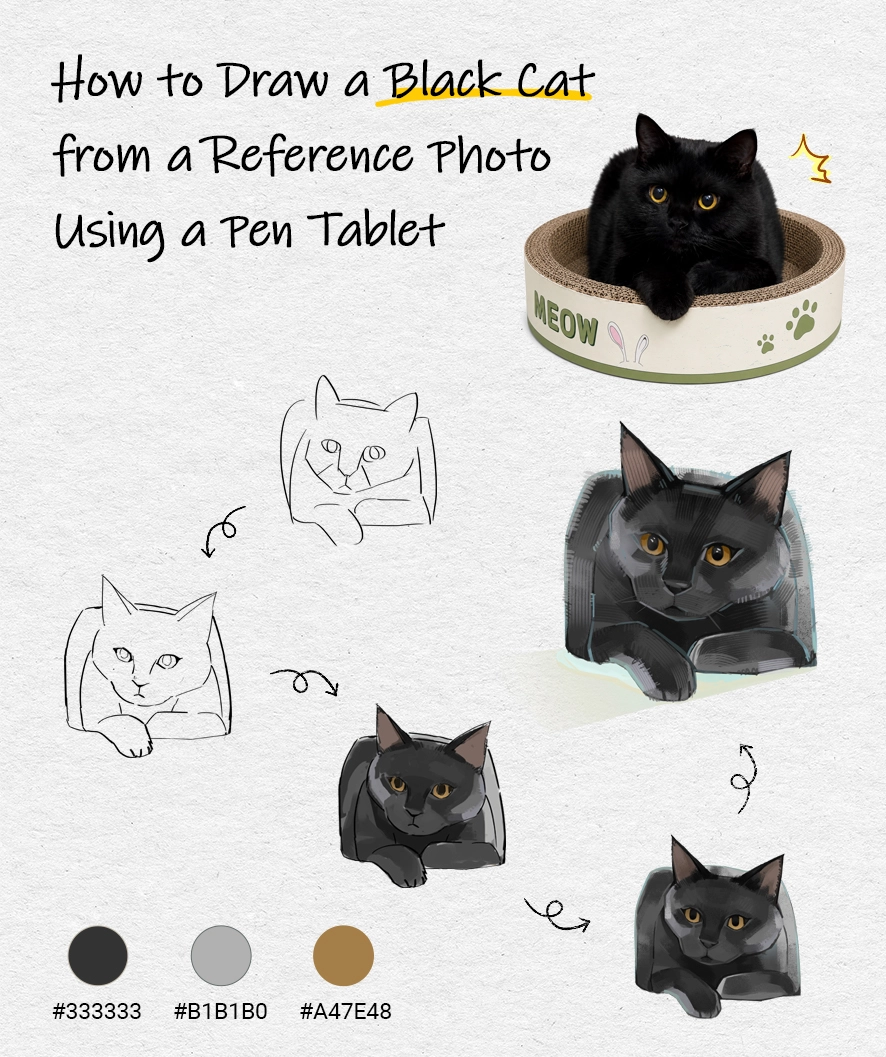
Start by creating a loose sketch of your cat’s pose. For this tutorial, we’ll focus on a black cat lying down pose with slightly curled paws and a relaxed expression
Keep the sketch simple at first:
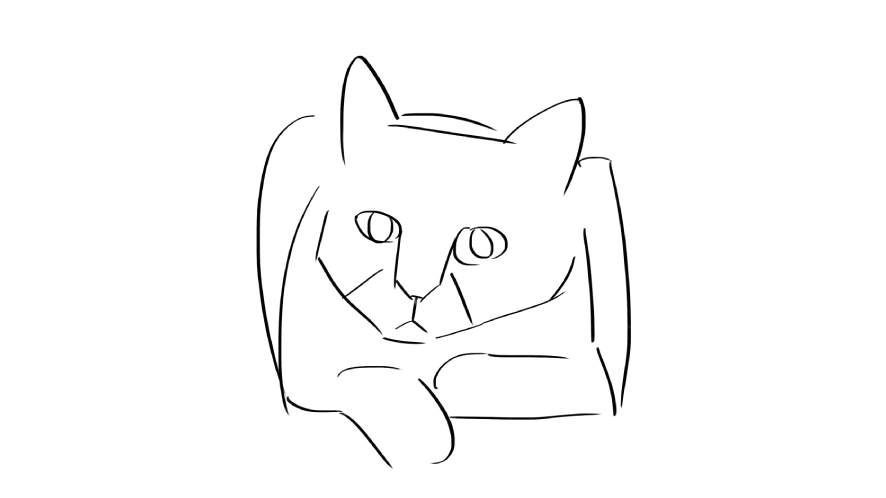
Start refining the sketch:
• Define the cheeks and muzzle
• Adjust paw proportions and shape the paw more naturally
• Refine the eyes and nose
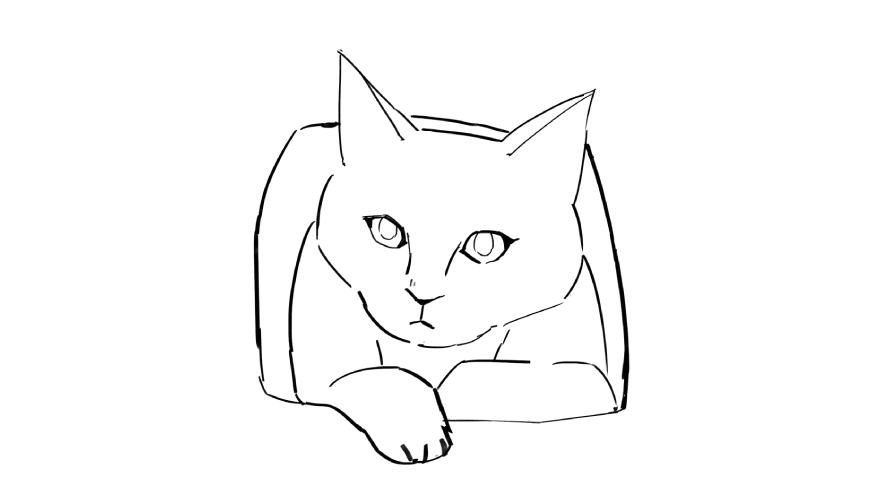
When using a pen tablet, lowering brush opacity can help you layer sketches naturally without creating messy lines. A cleaner sketch also makes it easier to place fur direction and lighting later on.
Step 2: Apply the Base Colors
Next, create a flat colour layer underneath your sketch.
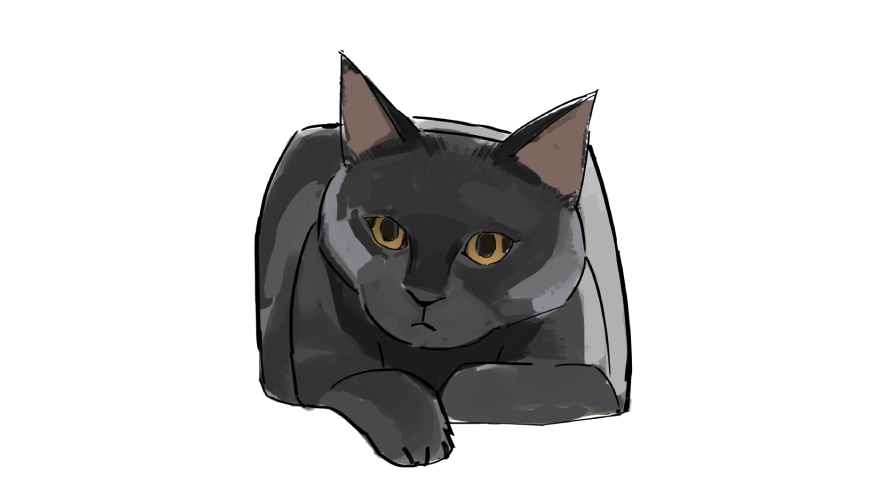
Although the cat is black, avoid using pure black immediately. Instead, choose a very dark grey and cool grey as the base tone. This gives you more flexibility when adding highlights and shadows later.
For the ears, use a brown-grey tone to keep them slightly warm and natural within the overall dark palette.
For the eyes, use an antique gold tone if you want to create a black cat with yellow eyes drawing. Yellow or gold eyes usually stand out well against dark fur, especially in close-up portraits.
Step 3: Refine the Light and Shadow Areas
At this point, the rough sketch should start blending into more solid forms. The earlier rough lines start to settle, and the forms of the cat become clearer and more cohesive.
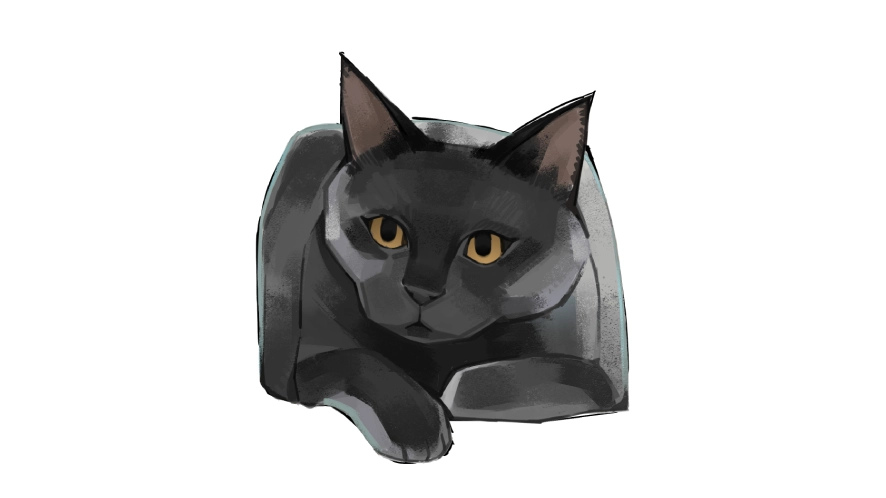
As you work through the shapes, focus on gradually refining the overall form rather than adding anything too heavy. Try to avoid sharp transitions everywhere, especially around the body and fur edges.
Dark fur can quickly turn into one flat shape if the shadows become too heavy, it’s better to keep a balance between soft transitions and some slightly clearer edges. This helps the drawing keep its shape and depth without feeling flat.
Step 4: Add Facial Highlights and Reflected Light
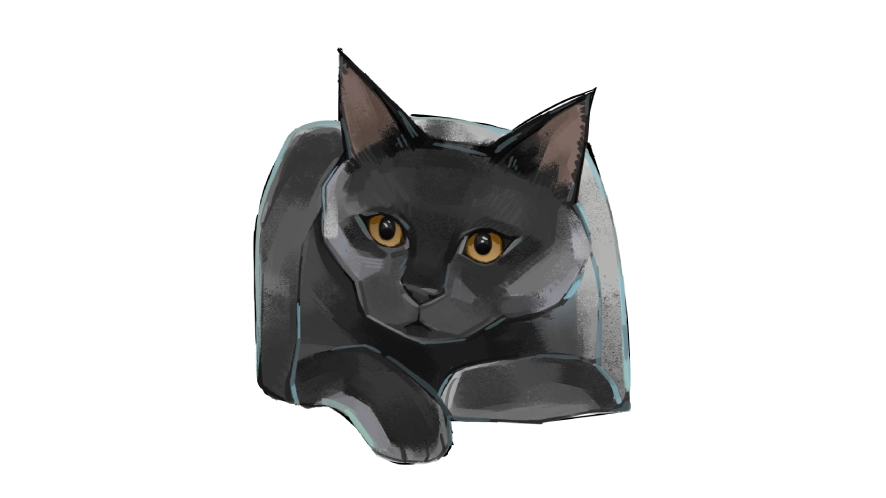
The face is the emotional centre of any cat portrait drawing, so this stage deserves extra attention.
Add subtle highlights:
• Around the cheeks
• Along the nose bridge
• Near the ears
Then introduce reflected light along the lower jaw and body edges. Even dark fur catches environmental light, especially around curved surfaces.
Even small highlights can separate the face from the darker body areas.
Slightly larger eyes and softer highlights can make the cat face expression feel cute and appealing.
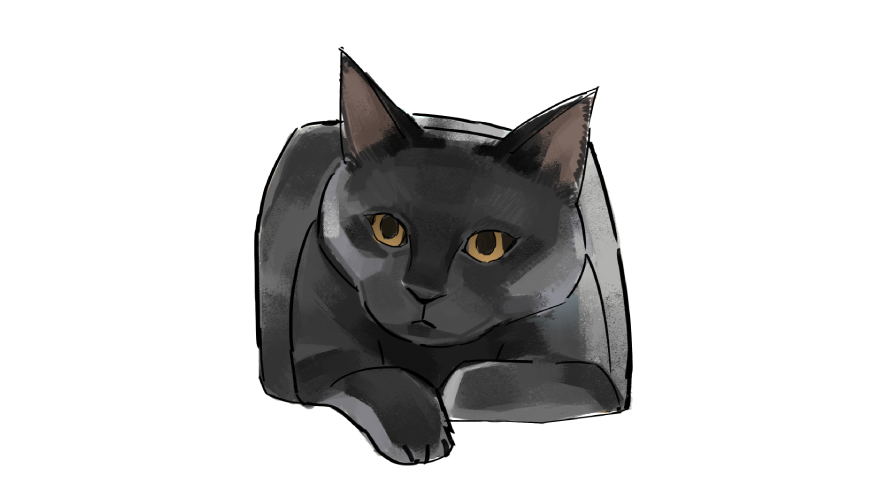
Step 5: Add Fur Texture
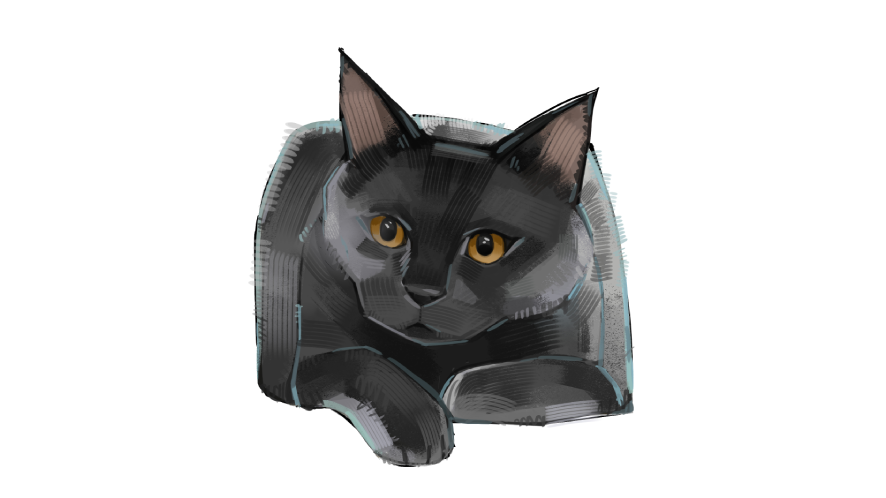
Now it’s time to build realistic fur texture.
Use a textured brush with light pen pressure and follow the natural fur direction:
• Short strokes around the face
• Longer strokes along the body
• Soft layered strands around the chest and tail
Step 6: Add Whisker Shadows and Final Details
The last details are usually what make the portrait feel finished.
Add:
• Whiskers with quick confident strokes
• Tiny whisker shadows on the muzzle
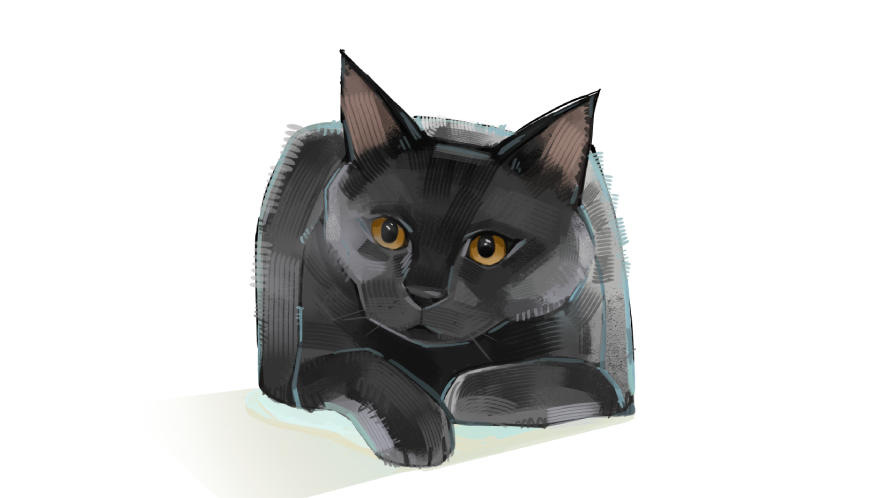
Without small whisker shadows, the whiskers can look like they’re floating on top of the face. Small whisker shadows help the whiskers sit more naturally on the face.
Zoom out regularly to check the overall balance of the artwork before making final adjustments.
Learning how to create a black cat drawing digitally is a fantastic exercise for improving shading, lighting, texture, and line control.
Whether you’re practising an easy black cat drawing or developing a detailed realistic black cat drawing, working digitally gives you more flexibility to experiment and refine your style.
From rough sketches to detailed fur rendering, a reliable digital art tablet helps artists create smoother and more natural illustrations.
Continue Exploring Digital Art Techniques
At Xencelabs, we believe improving as an artist happens through both practice and community learning.
Beyond tutorials, the Xencelabs community regularly shares:
• professional artist tips and workflows
• drawing techniques and creative exercises
• product tips and tricks for digital illustration
• inspiring artwork created by artists using Xencelabs tools
Whether you’re practising cat portrait drawing, exploring lighting studies, or refining fur textures, learning from other creators can make the process more enjoyable and motivating.
You can also explore more tutorials, artist insights, and community artwork to continue developing your own illustration style.